I have been firing the burner up and running it for increasingly longer periods of time. I think the refractory is finally dried out for the most part. The inside of the melter pretty much looks the same as it did the day after I packed it in there.
A little over a week ago I got my crucible. I decided to order a silica-graphite crucible instaed of trying to build my own. It has been fun building this melter, burner and all, but I was getting a little tired of building everything and decided to treat myself and purchase a ready-made crucible. What I didn't realize when I purchased it was that it needs to be treated just like the refractory in the melter in that it needs to be warmed slowly over a few heats to drive out the moisture it may have picked up. Since I was already doing this to drive the moisture out of the refractory for the melter...all I had to do was place the crucible inside the melter then fire up the burner.
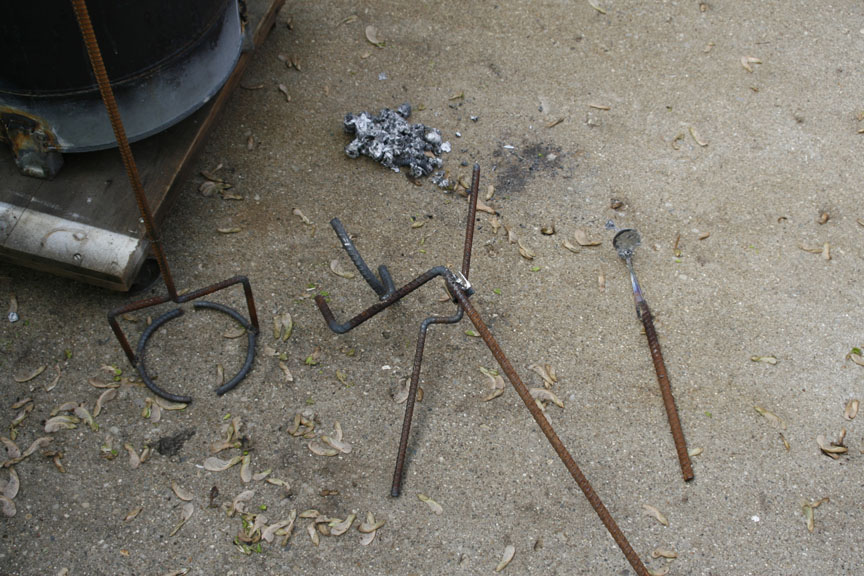
The past couple of days I have been busy making some of the tools I was going to use when melting metal. I knew I was going to need some way to remove the crucible once the metal was melted so I made some tongs. Actually, I made two sets. The first set worked great, but they were too big to fit inside the melter when the crucible was inside so I had go back to the drawing board and make another set.
After making the tongs which would allow me to lift the hot crucible out of the melter I decided I needed something to allow me to lift and manipulate the crucible so that I could pour the molten metal out of it. I have no idea what this type of tool is called and I haven't come up with a name for what I made, but it works!!!
Then from reading pages and posts from other backyard metal melters I figured I needed to have something that would allow me to skim the "crud" off the top of the molten metal. I got an idea from someone else and picked up a stainless steel spoon, drilled some holes in it, then welded it to a short piece of metal. It looks kind of funky, but it works!
Below is a picture of my tools I fabricated.
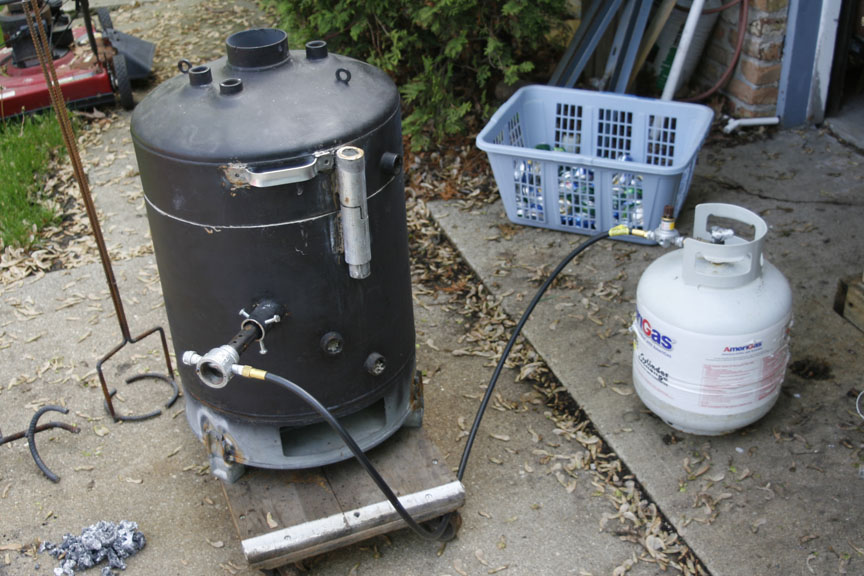
I was curious as to what to melt. I decided I had many, many aluminum soda cans so I filled up the crucible, placed it in the melter and fired up the burner. It took a short time for the melter and crucible to come up to temprature. Once at temprature the soda cans melted down quite quickly, so I continued adding more and more. I then added some aluminum I got from a burner control off the hot water heater I made the melter out of.
Here is a picture of the setup of the melter as it was when I was melting the aluminum
After all of the metal was melted...or at least appeared that way I figured it was time to "skim" the molten metal so I lifted the lid on the melter and opened it up. I used the skimming tool I made and pulled a bunch of "gunk" off the top of the molten metal. From not doing this before I decided maybe I needed to allow the metal to come back up to temprature so I closed the lid on the melter and allowed the metal to heat back up. After a few minutes I decided to pull the crucible out, then pour the metal.
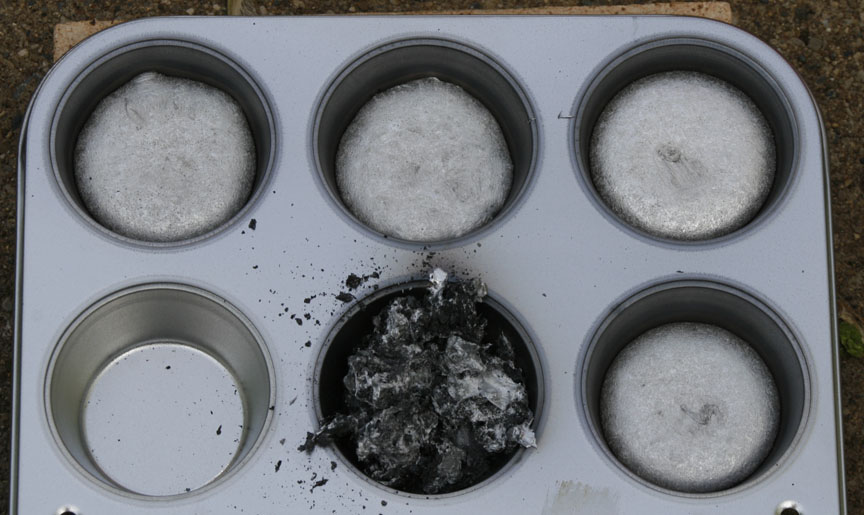
Here is a picture of the results of my very first pour.
I've got to say, the tools I fabricated worked just as I had hoped! I think this being my first melt and pour, everything went really well. I skimmed a lot more junk than I expected. I think I've read somewhere that many don't melt down soda cans because it is not worth it. I can't help but wonder if a lot of the stuff I was skimming off came from melting down those soda cans. I have more soda cans I can melt down, but I think I'm going to start looking for other sources of aluminum that I can melt.
I used a muffin pan to pour the molten aluminum in. I don't know what others use. I noticed that the chunks of aluminum didn't initially fall out of the muffin pan. I decided to let it sit and cool all of the way and maybe the aluminum will shrink down enough that the chunks will fall out. For now, I'm not sure.
Again, this has been a fun and interesting project. It has been fun fabricating the melter, burner, and the tools for this project. I've been able to work on my welding again as I usually didn't have a need to weld anything. I look forward to melting more metal and in the future actually casting some projects, but first I need to learn more about how to cast and how to make the molds to perform the casting.
Check back later for further updates on this project/hobby.
Rick
Back to Melter Home